
You thought you can just ride all day long and shoot them Freaks until they don’t come up anymore. Well, it’s a different kind of jungle out there and you need all the help you can get. I’ve provided some inputs of what I think about the game so far, you can read it here if you’d like.
I’ll be providing you some tips too to help you survive longer in Bend Studios’ post-apocalyptic zombie survival game, Days Gone.
MELEE WEAPONS.
Camp Credits could run very low especially when you don’t have the right gear yet. Saving as much as you can is a definite must and that includes saving up ammo. Melee weapons can be picked wherever and upgrading the correct tier unlocks craftable melee weapons that either has high durability or damage. The higher the durability the lesser it weakens whenever you wield it. Picked up melee weapons are much weaker than crafted ones and the more heads you hit with it, durability lowers. Don’t panic though, you can always fix them up by using scrap.
RANGE WEAPONS.
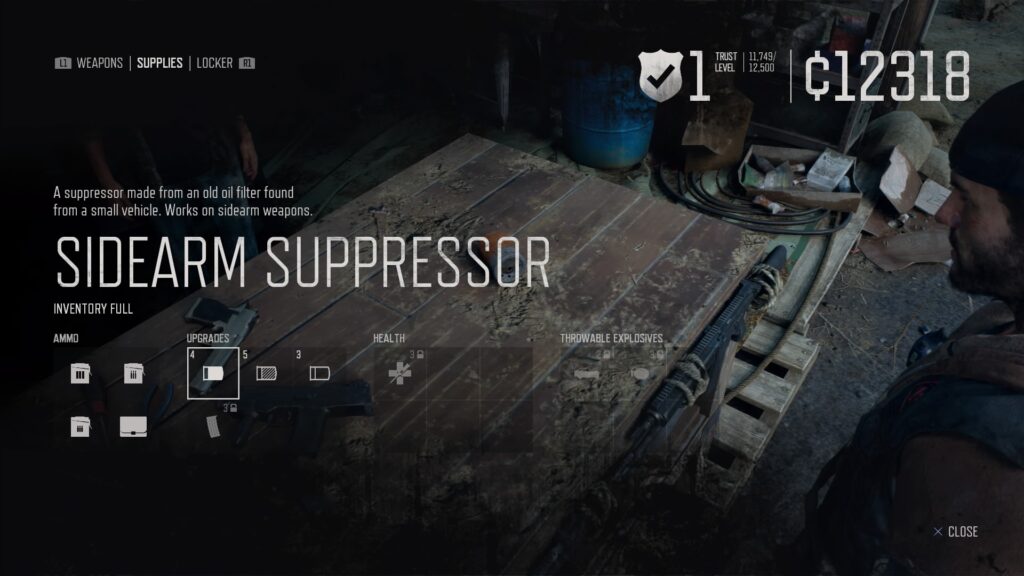
As soon as you have enough camp credits to spare, buy yourself some suppressors from the Merchant shop. Now each gun will have their own specific suppressors. Scrolling further the ranged weapons selection gives you a choice to equip the suppressor by pressing R1. Once done, you can now start doing some head shots without alerting enemies nearby. This is very important especially when you do raids at night since gun noise attracts Freaks and you don’t want unnecessary attention.
NERO MOVING MEDICAL UNIT (MMU).
NERO MMU’s has an injector inside that increases health, stamina and focus. Now before you can enter the unit, you’ll have to power up the generator. Once it’s full of gas,you may now enter the unit. Before you turn on that lighted switch, you’ll have to disable the speaker intercoms surrounding the area. They are usually located on top of those units. It can also be found near entrances and be sure to check them poles located inside or outside the barricades. If left functional, Freaks will start to surround the location. You just basically created a horde and dug up your own grave. If you were unable to disable all of ’em, Deek will comment that an intercom will bring all freaks unto your location and a volume icon will appear on your mini map. Just quickly turn off the generator and head to where the intercom is and disable it.
THE HUN.
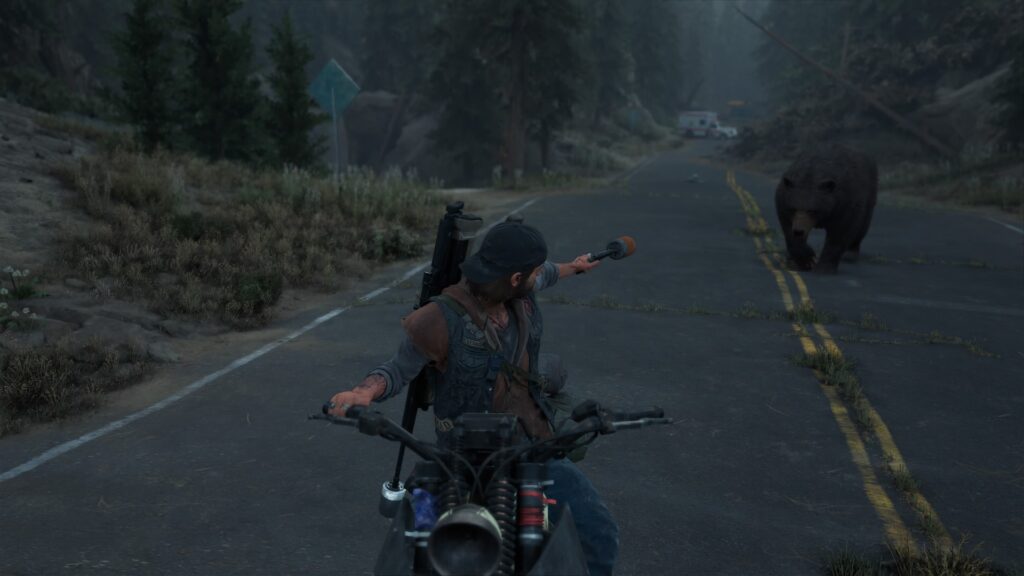
Wildlife are still running around the map and some of them could get really vicious. If you spot a wolf, usually they travel with a buddy or two. Make sure you are ready as they pounce instantly and moves really fast. Bears are a different story. They are quite resilient and when you are on foot, they are fast creatures and a few shotgun to the head kills it. But if you ride your motorcycle and targets the Bear, movements of this animal drastically slows down. Just slowly move forward while the reticle of the gun focuses on the bear and keep shooting. Don’t do this though when there are freaks around. They can still hurt you even if you are on your bike.
FUEL CANS.
These lifesaver’s location is never random as it will always spawn where you spot them first. If there are canisters near a camp, you don’t really have to use your credits to top up. This will save you a lot of money to buy upgrades or precious ammo. When you are running low on fuel in an area where you have visited before, just remember where you last saw a fuel can and it will just sit there waiting to fill up your motorbike so you can explore again.
BOTANY.
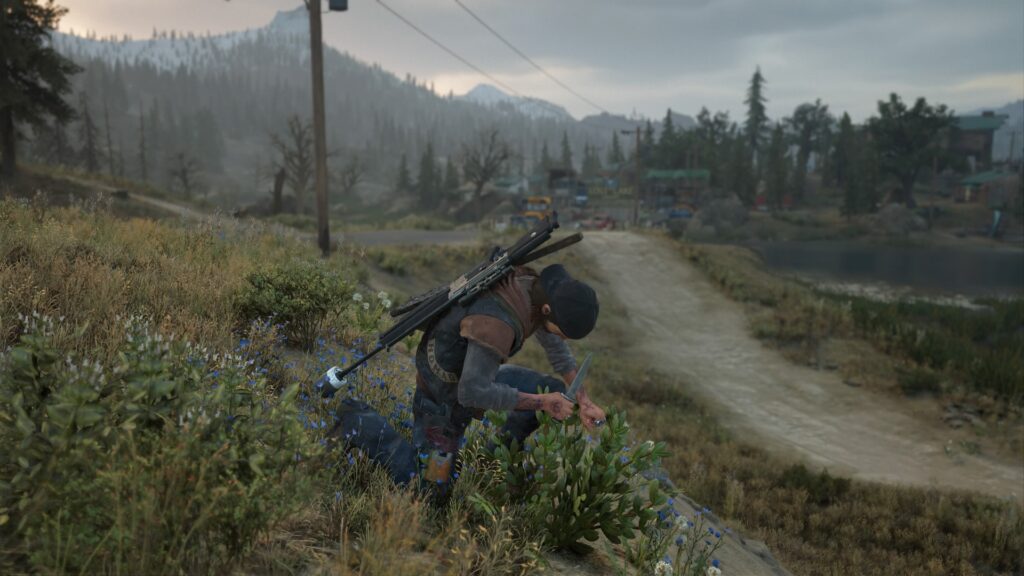
You may see some plant icons on your mini map. Pick these babies out as early as you can as a few of them are essential crafting ingredients. They don’t really yield much in an Encampment Kitchen but could be the difference between life and death if you run into a horde and in need of a stamina or focus boost.